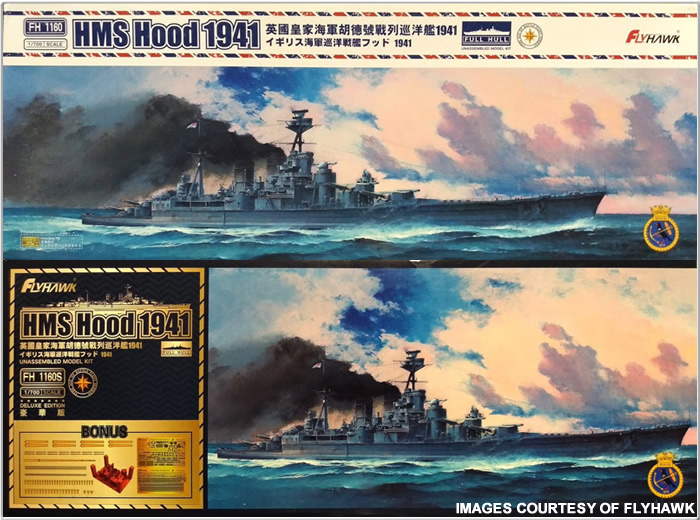
Box art for the Flyhawk kit (basic on top, deluxe on bottom)
Background
There has been no shortage of H.M.S. Hood model kits over the years. Indeed, they've come in a variety of scales/sizes and mediums. Among the most popular of these have been the 1/700 scale plastic models that first appeared in the 1970s. These are perfect for many modellers in that they are (arguably) not too big nor too small and are generally affordable.
The first and perhaps most famous kit in this scale was Tamiya's waterline series 1941 Hood. Shortly thereafter followed Italeri/Testors/Zvezda 1/720 1933 Hood. Both were excellent models for their day, but by the early 2000s had become quite dated. The reason for this was simple: moulding technology improved, plus a great deal more information had been rediscovered about Hood. Many unpublished photos had come to light, the wreck had been visited and volumes of official documentation was released. This information brought to light changes in Hood's final/1941 appearance...and this necessitated the release of newer models.
In the early 2000s, Trumpeter Models decided to up the ante by releasing two versions of Hood in 1/700 scale. These would represent the ship as she appeared in 1931 and 1941. We assisted by providing the (then) best available information at the time. As such, the models were significantly superior in accuracy to earlier offerings. Despite this, time marches on and even MORE details of Hood were rediscovered, and thus it was that Flyhawk Model arrived on the scene.
By 2020, Flyhawk was a well-established producer of some of the finest small scale injection moulded ship models in the world. With a focus on interesting (if not different) subject matter and an emphasis on details/accuracy and the latest moulding technology, Flyhawk is currently the best in the 1/700 business. Having had great success with excellent models of Bismarck and Prince of Wales, they also wanted to develop a new model of Hood. We were informed of this project and volunteered to help. Flyhawk enthusiastically welcomed us aboard and thus began a year-long interaction that saw many new developments work their way into the final product. We and other experts would literally review the design drawings and point out any inaccuracies and provide photos or drawings to assist in corrections. This was done over and over again for the entirety of 2020 and into 2021 until the design was ready. The work culminated in the production of the most accurate model of Hood ever released in any scale.
Editions/Versions
The kit was initially released in May 2021 and currently comes in two editions: a basic/standard edition (FH 1160 which comes in a white box) and a deluxe edition (FH 1160S which comes in a black box). There was talk of a 1924 version of Hood following at a later date, but we've had no confirmation of this time. Should Flyhawk wish to create a 1924 Hood, we stand ready to assist (because 1923-1924 is perhaps the MOST covered year of Hood's career).
Moulding & Detail
The basic kit is moulded in light grey plastic with @50 sprues/tree and large pieces. We've not yet counted the actual number of individual parts, but it must be well in the hundreds. The bulk of the plastic parts are sealed in 10 bags and the hull components are wrapped in light foam for protection. The plastic moulding is crisp with no flash and no serious ejector pin marks or flaws. A notable feature of this kit is that a number of key parts, such as superstructure components, the shelter/boat deck and funnels were created using slide mould technology. Additionally, the modeller has the option building the ship with full hull or in waterline format.
In addition to the primary plastic parts, there is also metal weight (for waterline usage), a decal sheet (flags) and a small photo etch fret. Our sample included a 21 page instruction guide, painting guide and a beautiful colour cardboard print of Hood at sea. The deluxe edition includes these contents as well as a superb multiple fret photoetch set (with lots of intricate details), a set of brass gun barrels (for 15" and 4" guns), brass mast parts, plus a set of 3D printed detail parts (vents).

Deluxe kit contents (click to enlarge).
Overall Impression
As we've said multiple times already, this is without doubt the best/most accurate commercially-produced model of Hood ever released in any scale. Having said that, its still not for everyone: the kit is intricately detailed with many delicate and TINY parts. One must pay CLOSE attention to the instructions (especially with the deluxe edition - there are many steps which need to be cross referenced with the photo etch instructions). So, this may not be the best kit for a young child to build alone/unassisted. It will also prove challenging (but by no means insurmountable) to older but inexperienced modellers. We don't want to scare anyone off, we merely want to make sure you know what to expect. As long as care is taken and one familiarises oneself with the kit and its instructions, a truly spectacular rendition of Hood can be built right out of the box. This model is THE benchmark for all Hood models.
Corrections & Suggestions for Improvement
 Although we helped develop the kit, we've not actually had time to fully build it yet (we've only done some test fitting and have painted the wooden planked decks). We have, however, had ample time to physically review sample kits in detail plus read other online reviews. Thus, the following observations are based on direct examination of the kit sprues and details uncovered during other peoples' kit builds.
We've honestly not come across any show-stopping issues with this model The (very) few we've come across are easily ignored or repaired and are listed below. Click on the accompanying photos to see larger versions.
Hull Underside
The only real issue we had with our model sample was the fit of the hull bottom. Although it was generally quite good, there were some spots where its edges were not flush with the main hull (resulting in a small "shelf" or step). This is fixed with a little putty and some very careful sanding. If building a waterline, then there are no issues.
As for detailing, Flyhawk had originally wished to depict the lower hull plating. Unfortunately, we lacked access to the official bottom plating blueprints (they are in poor shape and are off limits until they can be restored and conserved) and had incomplete photographic coverage. Rather than engage in guesswork and potentially produce errors, Flyhawk wisely opted to omit the plating.
Once the plans are conserved (which could still be quite some time from now), modelers can then attempt to recreate the plating through scribing or through tape/paint buildup. They can also attempt the plating by reviewing photos of Hood under construction (which will require some guesswork for the bottom-most plates and features). Of course, one can leave it as-is since most ships in this scale have smooth bottoms. Of course, one also have the option of building it as a waterline model.
 Bridge
Conning Tower Platform - The narrow end of the Conning Tower Platform (part K-1) is missing two very small sections of splinter shielding/bulwarks at the narrow end. We're not sure how we overlooked this when helping develop the kit, but unfortunately we did. This can easily be corrected by simply adding two small pieces of styrene the same height as the rest of the shielding.
Funnel Photoetch
In the deluxe edition of the kit, the instructions call for the addition of photo etch lines (parts A64) along the sides of the funnels just below the top flanges. This is an error. The items in question are not funnel stays (the lines which supported the funnels), but are actually rigging points for scaffolding. In port, ropes could be rigged to allow scaffolding to be hoisted for maintenance/painting. As such,only the pulleys were permanent. The ropes were rigged as needed. So, unless you're building the ship in port being cleaned/painted, you can leave these parts off.
 Of course, we do recommend adding funnel stays for those who are so inclined, but photoetch isn't needed to accomplish this. You can easily rig them using thinly stretched sprue, monofilament or a product like EZ line or Uschi van der Rosten's Rig that Thing.
Oil Fenders
Another feature omitted from this model was the "pile" of oil fenders that were normally stored on the boat deck. These fenders were hung along Hood's sides when transferring fuel to or from the ship (or whenever extra protection was needed for being alongside another ship or structure). The exact composition and layout of the fender storage is not clear (as there very few photos that show it in any kind of detail post 1940).
 During wartime, the fenders were stored on the starboard side roughly abreast the long engine room vent and just behind the ship's large boats and launches. The image to the right contains the best known views from 1941. This structure can probably be made from styrene parts and rigging material. As for color, we surmise if likely had wood elements and dark fenders.
Mainmast Flag/Ensign Gaff
The basic kit apparently does not include the flag gaff that was attached to the mainmast just above the starfish platform. This was essentially a "flagpole" that stuck out at an angle from the rear of the mast. This is another easy fix however: simply add a piece of wire/rod in this position. The part is included in the deluxe version.
 Rear Superstructure
After Searchlight Platform/After Concentrating Position - This structure is covered in Step 22. Overall, this area is highly accurate. There are only two very small detail issues related to part L-1: first, there was what appears to be a small ledge from within the portside "indentation." This is part is represented by photoetch part PE-21. Its very difficult to discern the exact size and dimensions of the real structure aboard Hood. It may have been a rectangle (as represented by PE-21) but it may also have been more triangular. Its difficult to say for certain (see the image to the right for more details).
The second issue concerns a missing detail that we overlooked when reviewing the final kit design: One of the angled roof supports is missing. Its the largest support that went from the upper rear edge of the central structure into the tiny After Concentrating Position (this is the area with the tiny windows around the upper rear of the structure). This can also be see in the image to the right. This is easily added with thin styrene strip cut to shape (remember to cut a circular lightening hole in the centre for extra detail). We recommend adding the central support to L-1 BEFORE attaching the top (part Q-4) as its a very tight fit.
Painting Instructions
A significant discovery was made just before the model was released: we found absolute proof that Hood's bottom was never painted red. She had always used only grey (and possibly black). Flyhawk was able to add this into the kit's instructions just before release. Unfortunately, they were unable to remove an earlier colour guide showing a read bottom. This is not meant as an optional paint scheme. Her bottom was grey, end of story. You are more than welcome to paint your model however you like, but if you want an accurate Hood, don't use red.
I'd also like to recommend the excellent painting mask produced for this kit. Its a great pre-cut means of masking the decks for precise painting (and it beats having to cut out and later remove hundreds of tiny pieces!).
Late Updates
There were some changes to the model's photoetch for the starfish platforms. Some models may come with extra updated parts to replace the incorrect parts. Please be sure to read the instructions closely and review all parts before construction. This again ties to being familiar with the instructions and kit parts.
Other Suggestions
As always, just about any 1/700 scale ship model can benefit from additional detailing. The following are some generic suggestions (most of which are in the deluxe version but can also be purchased separately):
- Use photoetch ladders, stairs and rails.
- Replace cable/hose reels with photoetch.
- Replace mast yards, flag staffs, etc., with photoetch, wire or strip stock
- Use brass barrels
- Add funnel stays, rigging and aerials using monofilament or an elastic product such as those offered by Uschi van der Rosten and EZ-Line.
- Try painting planking with different shades of tan. If you don't like painting, you can always add a wooden deck applique (but tone it down as it may be too bright).
- Give her the correct paint scheme! Whatever you do, don't paint her bottom red! See our article on the Paint Schemes of H.M.S. Hood, 1920-1941
Resources & References (Which Ones to Use & Which Ones to Avoid)
Good References (Recommended)
This kit reflects all the latest and greatest information known about Hood's final configuration. As a result, you really have all you need in the box. Of course, it doesn't hurt to check our website (you're already here) as well as the always EXCELLENT On the Slipway website by EJ Foeth.
References to Avoid (Not Recommended)
The following items are widely available and seem to have found their way into many Hood enthusiasts bookshelves. At first glance, or to those less familiar with the ship, they seem excellent...and some parts of them are. Unfortunately, they also have some very serious errors. The bad outweighs the good. We strongly advise against relying upon them as references when building models of Hood.
- Profile Morskie 63: H.M.S. Hood" monograph by Jerzy Moscinski & Slawomir Brzezinski " - The plans associated with this book are quite detailed and accurate in a some areas, but there are also numerous substantial errors. Some were not known at the time the book was created but some were quite well documented. There are other errors that make no sense at all : the authors depict Hood as having two differently sized funnels!!! How on earth did they make such a major mistake? So the book in its current form should not be used as a primary reference source. Should they ever wish to correct the errors, we will be more than happy to help.
- "The Battlecruiser HMS Hood" by Stefan Draminski - There are two Kagero titles on Hood - one is part of the "Super Drawings in 3D" series, the other is part of the "Topdrawings" series. Both appear to come from the same source materials (possibly Profile Morskie 63 or the same flawed reference materials it was based upon). Although the graphics are extremely nice/well executed drawings and renderings of Hood, there are are a number of significant mistakes. These range from the bridge drawings, raft placements and boat deck structures all the way to the colour scheme depicted.
This one is particularly frustrating as its impacted many models now. First, it may have impacted the design of Trumpeter's enormous 1/200 Hood (which is known for its many flaws). Second, its widely available and very affordable, so many Hood enthusiasts have picked up a copy. Many modellers have mistakenly assumed that it must be correct and now have flawed models because of it. Its also frustrating because the author generally does excellent work but something went wrong with this one. So, at this point in time, we cannot recommend this book at all...its simply too flawed. Important Note- We've contacted the author and have offered to help him should he ever wish to correct his drawings. We will happily provide all the latest structural and colour references to help improve future editions of this book should the opportunity arise. Until then, we must warn modellers about its accuracy and advise they steer clear.
Photos of Completed Kit


Shown here are three views (click to enlarge) of Phillip Loughlin's excellent Flyhawk 1/700 Hood build.
You can read more about it at the excellent site "Brit Model Builder" here: 1/700 HMS Hood Flyhawk Deluxe
Kit Build
If anyone has built this kit and would like to share the experience, please let us know. We'll gladly add an article or photos here.
- Studio Blue Ocean's Youtube video "1/700 THE MIGHTY HOOD ( Flyhawk Deluxe Edition )" and his follow-up video, "HOW TO - Ocean Base for HMS HOOD"
- Brit Model Builder's : 1/700 HMS Hood Flyhawk Deluxe
Aftermarket Parts
The following are Flyhawk produced parts that can be used to build this model. There are almost certainly other producers making similar parts. If anyone out there knows of other products specifically for this kit (other than those listed here), please let us know.
- FH710119 - 1:700 HMS Hood 1941 - Metal Gun Barrels (part of deluxe kit)
- FH710120 - HMS Hood 1941 Painting Mask.
- FH10121 - 1:700 HMS Hood 1941 - Upgrade Set (key elements are part of deluxe kit)
- FH710124 - HMS Hood 1941 Wooden Deck Veneer.
- FH710125 - 1:700 HMS Hood 1941 - Hoist Detail Set (part of deluxe kit)
- FH710126 - 1:700 HMS Hood 1941 - Bitt Bollard
Other Reviews (Alphabetically Sorted)