Expedition Overview | Wreck Overview | Superstructure, Pt 1 | Superstructure, Pt 2 | Upper Deck & Barbettes | Secondary & AAA Guns | Hull Damage | Torpedo Damage | Assorted "Debris"
Assorted Superstructure Photos, Part 1
Shown here are photos showing various portions of Bismarck's superstructure. Despite the shell holes, splinter damage and multitude rust, the structures are quite intact and easily recognisable. In most places, her light grey vertical surface and her dark grey horizontal surface paint is still amazingly intact. Please note that we have slightly modified these photos: all were reduced in size and lightened/brightened somewhat to bring out detail. Also, please be aware that this page is image intensive, and may take some time to fully load.
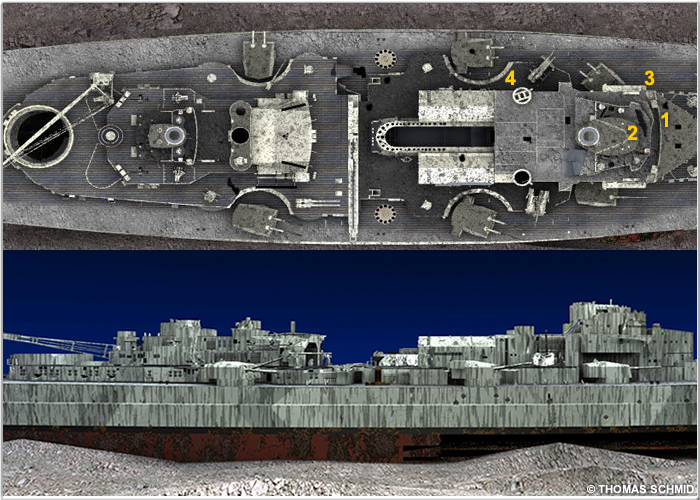
Above- A "You are here" map of Bismarck's superstructure. The numbers listed on the above image correspond to the areas/items shown
in the various photos below.
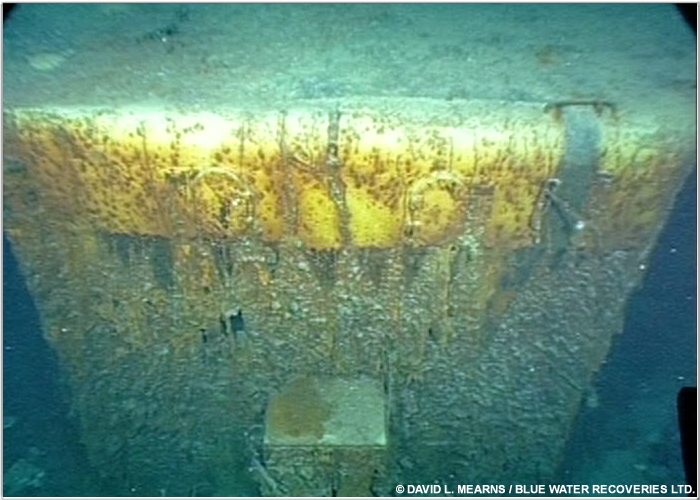
This, and the following three photos correspond to "1" on the superstructure map at the top of the page. This is the very front of the lower portion of the forward superstructure.
Just out of frame at the bottom is a transatlantic communications cable which passes directly over the wreck!
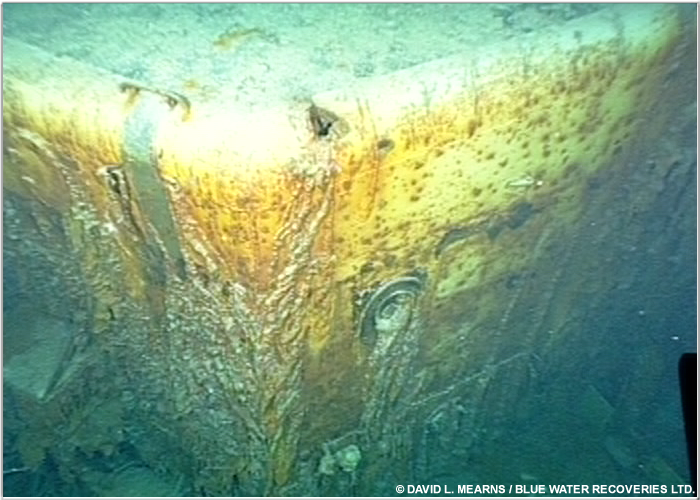
The port front corner of the forward superstructure. Note the dark grey paint on the top surface. Even here, there is a good deal of sediment left over from the impact and slide.
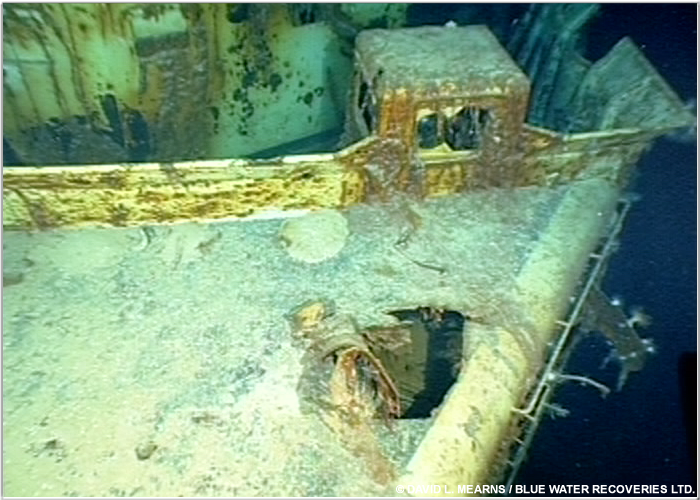
A view of the Open Bridge and a large shell hole. Note the shuttered windows in the background and the dark grey paint in the foreground.
The same area, viewed from port.
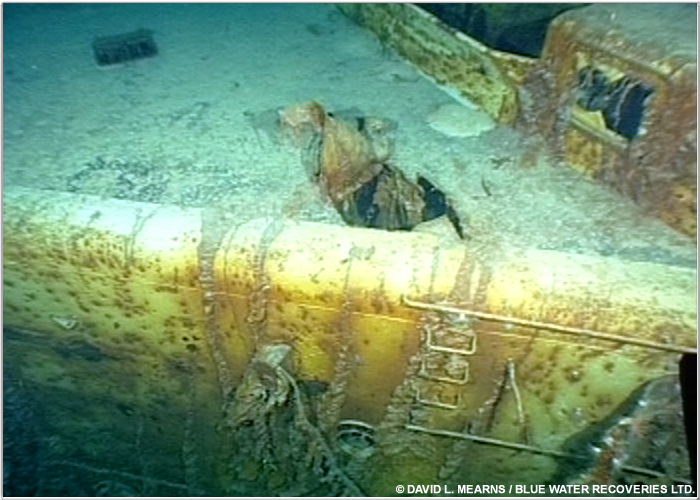
This, and the following three photos correspond to "2" on the superstructure map at the top of the page. A large calibre shell hole. This shot penetrated this light plating, passed over the Navigation Bridge and and impacted the Conning Tower immediately abaft it.
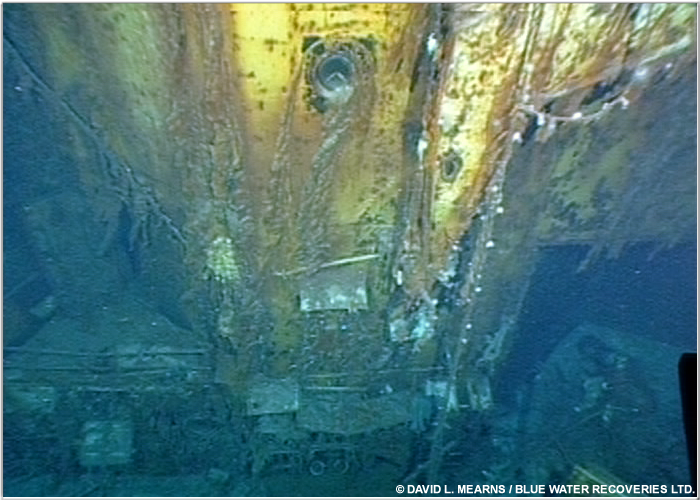
The port side of the Conning Tower, facing forward. This portion of the Lower Mast Deck has been ripped open and the Conning Tower's door is no longer in place. The 7m rangefinder that once sat atop the Conning Tower is missing.
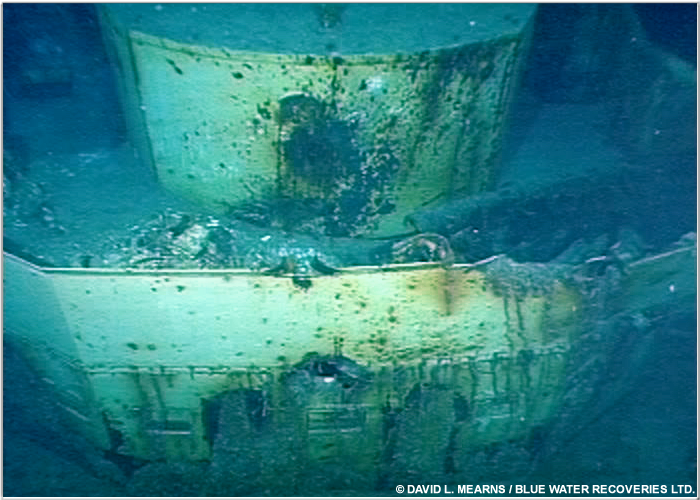
Overhead view of the large, ripped up Navigation Bridge section in front of the Conning Tower. Note the dark grey paint on the roof of the Conning Tower in the upper left of this photo. There is a good deal of sediment obscuring portions of the roof.
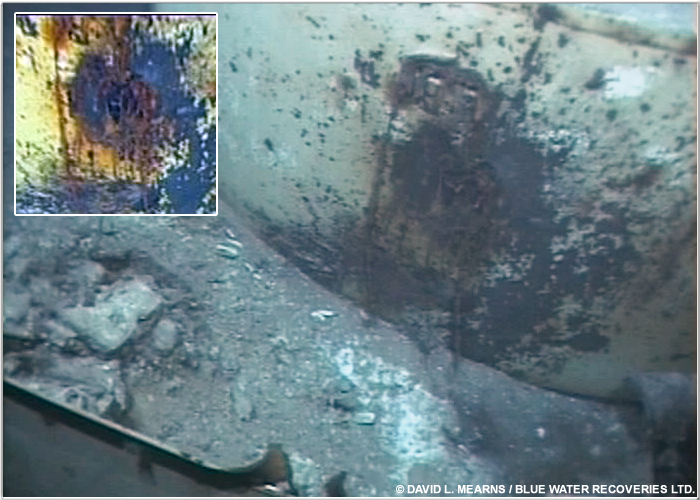
Above- Close-up of damage to the front of the Conning Tower. One of the "view slits" is just visible above the impact. Inset- The same impact, brightened and shown from a different angle.
This photo corresponds to "3" on the superstructure map at the top of the page.
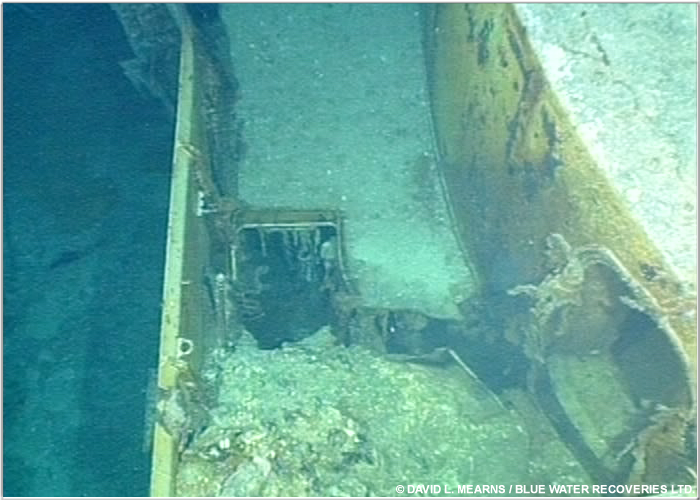
This is the block-like, forward superstructure's port side, forward. To the left, you can see the location of the forward most 4.1"/10.5cm L65 SK-C/37 antiaircraft mount, and to the bottom/ right, you can see the exposed interior of the forward most 5.9"/15cm gun mount. Its rear roof panel was blown away in Bismarck's final battle. At top/right, you can see the support base for the starboard folding bridge navigation "wing".
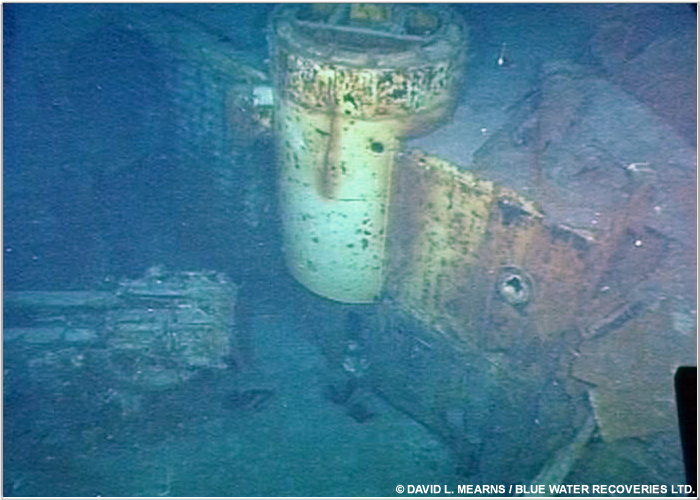
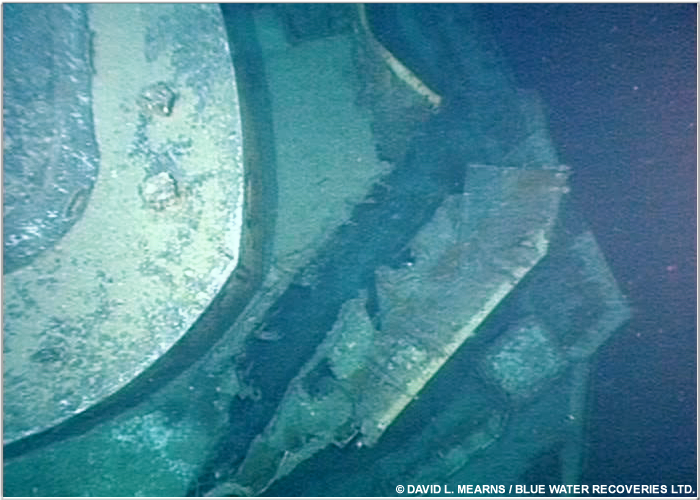
This photo corresponds to "4" on the superstructure map at the top of the page. A view of the port side of the lower bridge structure. To the left is 4.1"/10.5cm L65 SK-C/33 mount "P1". To the right, in the extremely "rusty" area, is the port aircraft hangar. The large "cylinder" in the middle of the photo is the base of one of Bismarck's antiaircraft/flak directors. It once held a 13ft/4m Type SL-8 director which was covered by a rotating dome known as a "wackeltopf" ("Wobbly Pot"). These are now missing (and are also missing on the starboard side). The area behind this structure was once occupied by the main superstructure towers base levels, the Upper and Lower Mast Decks.
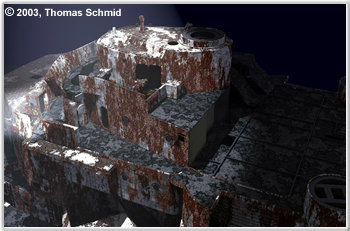
This is a computer rendering created by Thomas Schmid. It shows the point where the Lower Mast ripped in two- the forward part can be seen beneath the Conning Tower. The attachment lines from the aft part, can be seen to the right. The rear half detached when the bridge tower came loose during the sinking. Interestingly, it does not appear to be attached to the tower now. This image is of the port side, at a point just forward shown in the photo of the actual wreck immediately above.
Expedition Overview | Wreck Overview | Superstructure, Pt 1 | Superstructure, Pt 2 | Upper Deck & Barbettes | Secondary & AAA Guns | Hull Damage | Torpedo Damage | Assorted "Debris"