Expedition Overview | Wreck Overview | Superstructure, Pt 1 | Superstructure, Pt 2 | Upper Deck & Barbettes | Secondary & AAA Guns | Hull Damage | Torpedo Damage | Assorted "Debris"
Damage to the Upper Deck & Barbettes
Shown here are assorted instances of shell damage to the decking and barbettes. This is by no means a thorough look at all deck damage, but merely highlights some of the more notable instances. Please note that we have slightly modified these photos: all were reduced in size and lightened/brightened somewhat to bring out detail. Also, please be aware that this page is image intensive, and may take some time to fully load.
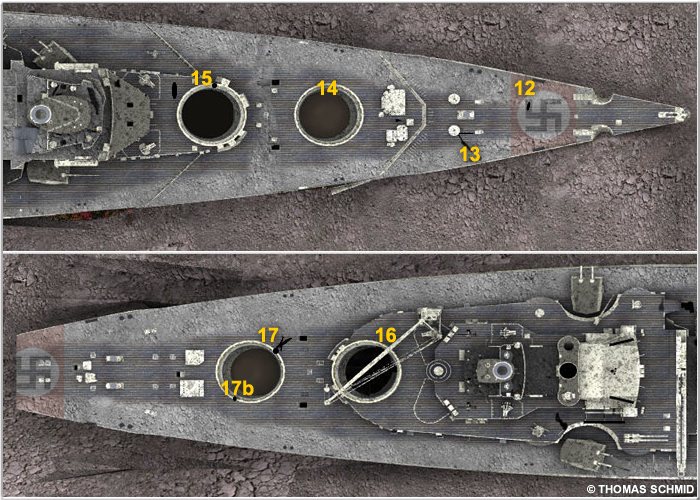
Above- A two-part "You are here" map showing the forward turret group (top) and the rear turret group (bottom).
The numbers listed on the above image correspond to the areas/items shown in the various photos below.
This corresponds to "12" on the hull map near the top of this page. The forward swastika marking, still visible on the planked forecastle of the Upper Deck. Traces of both the original red band as well as the later grey used to cover the marking are present. Its a poignant reminder of just who the battleship served.
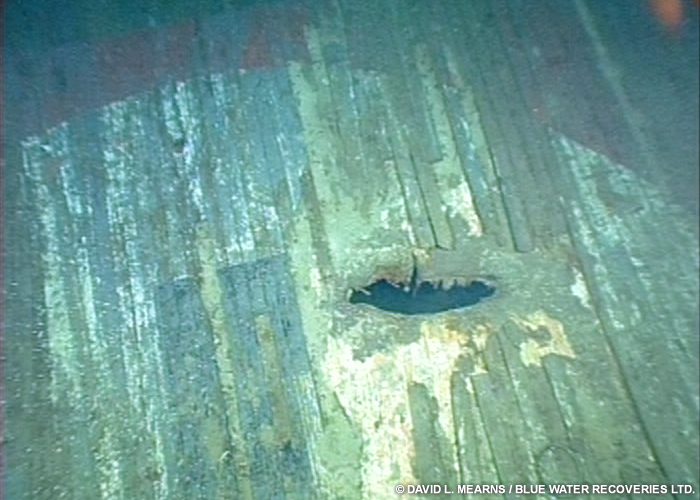
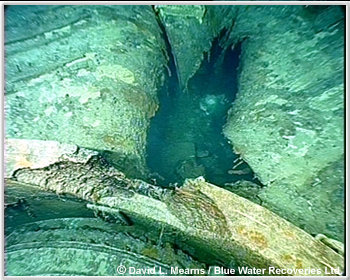
This, and the following photo correspond to "13" on the hull map. A shell hole through the forecastle on the starboard side of the Upper Deck (roughly parallel with the capstans). For those of you with Dr Ballard's book, turn to page 194/195 and you'll see his famous mosaic of this hole. You can also see the starboard navel pipe which leads down to the anchor cable (chain) locker. In the background, you can see the starboard deck edge.
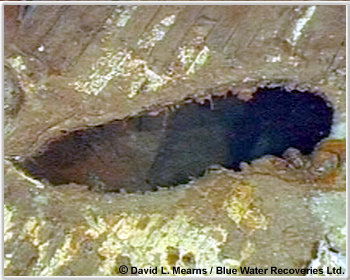
A close-up of the forecastle shell hole shown above.
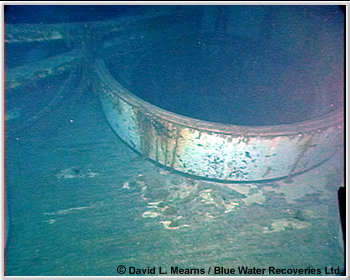
This, and the following photograph correspond to "14" on the hull map. The barbette for Turret "Anton". Note the non-penetrating shell hit. This is a good shot of the various tiers within the barbette as well. If you look closely, you'll see that the decking at the bottom right appears to be slightly depressed. This may be a sign of the compression the ship suffered when the bow struck the bottom during sinking. Note the copious amounts of sediment on the Upper Deck. This may also make the height of the deck in relation to the barbette look somewhat odd.
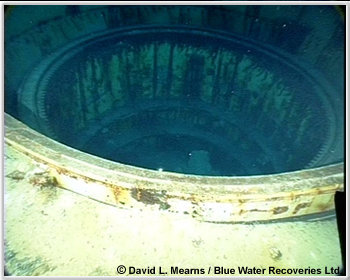
Another shell hit on the barbette for Turret "Anton".
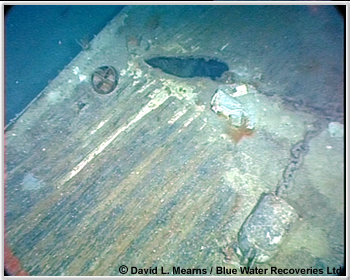
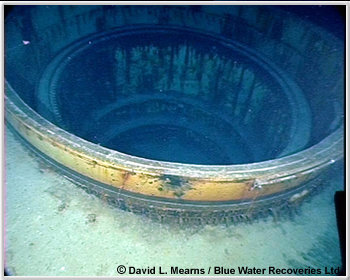
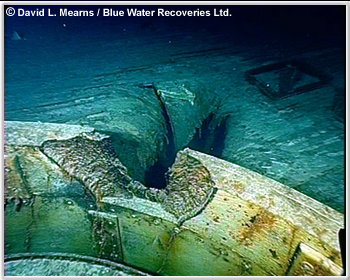
This, and the following photograph correspond to "15" on the hull map. A penetration through "B" barbette on the starboard side. The light platform that once encircled the front of the barbette is now gone. Note the vents near the bottom of the photo.
A shell hole near the barbette for turret "Bruno". This hole is located aft and to port of the barbette. Just out of view in the bottom/right corner is a transatlantic communications cable which crosses over the wreck.
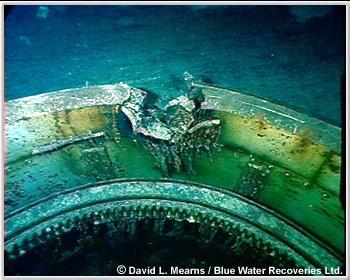
This corresponds to "16" on the hull map. The barbette for Turret "Caesar" with a crane lying across the forward edge. The Ballard expedition reported this to be only part of a crane. It is in fact, intact! The crane's base, still very much attached, is out of view to the left.
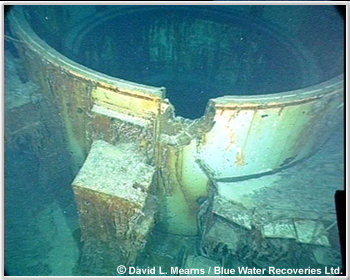
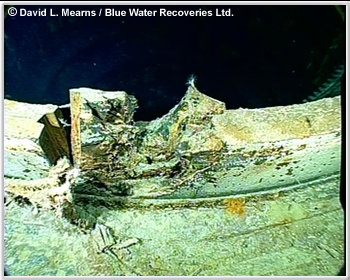
This, and the next photograph correspond to "17" on the hull map. A deck penetration and heavy damage to the port/forward rim of barbette "Dora".
Another view of "Dora". This shows that there was indeed a penetration of the barbette.
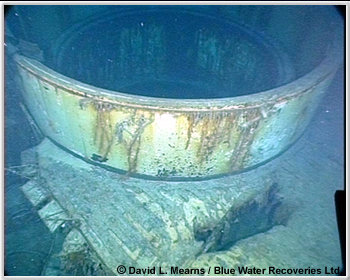
This, and the next photograph correspond to "17b" on the hull map. Another instance of heavy damage to barbette "Dora". This one is on the starboard quarter of the barbette.
A view of the starboard quarter damage to barbette "Dora", this time seen from the barbette's interior.
Expedition Overview | Wreck Overview | Superstructure, Pt 1 | Superstructure, Pt 2 | Upper Deck & Barbettes | Secondary & AAA Guns | Hull Damage | Torpedo Damage | Assorted "Debris"