Expedition Overview | Wreck Overview | The Bow | The Midsection | The Stern | Debris, Pt 1 | Debris, Pt 2 | Debris, Pt 3 | Memorial Plaque
Assorted Debris & Wreckage, Part 1
When Hood exploded, collapsed and sank, the ship was violently ripped apart. Much of what was deposited on the ocean floor was severely distorted, making recognition difficult. When preparing these pages, we were only able to consult the photos presented here. We were not able to view the raw video footage, nor see most items from different perspectives. These limitations, combined with the lack of any scale indicator, made precise determinations difficult at best. Nevertheless, we've done our best to identify the various pictured pieces here.
Please note that we have slightly modified some of these photos; some were lightened/brightened a small amount to reduce the "murkiness" inherent in underwater photographs. Lastly, please be aware that this page is image intensive, and may take some time to fully load.
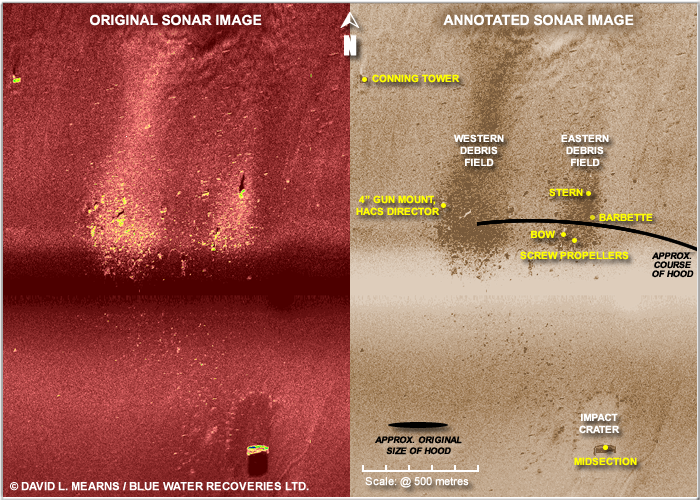
Sonar view of the Hood wreck site: On the left, the original Ocean Explorer 6000 side-scan sonar image from July 2001; On the right, an enhanced and annotated version.
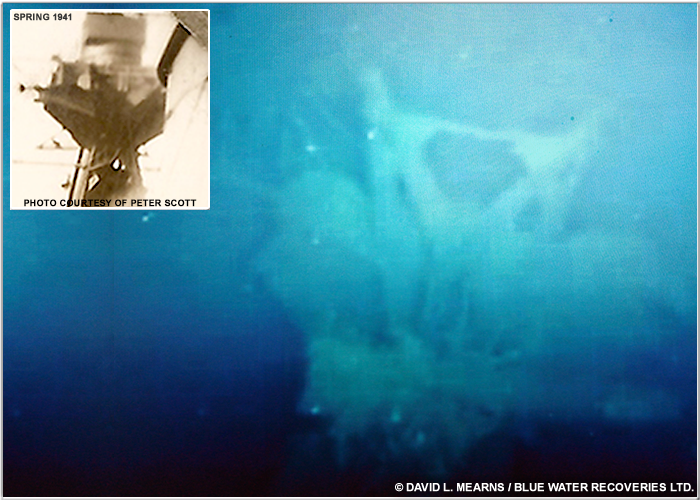
Above/Left- This is Hood's foremast, specifically, the underside rear of the starfish platform. A large portion of the foremast broke off sometime during the ship's descent. It came to rest upside down in the mud. Note that this photo has been turned upside down. We've deliberately done this in order to help the viewer make a better comparison to the accompanying inset photo; Inset- This is the same portion of the ship as it appeared in spring 1941.

A pair of boots lying where their owner fell in 1941. This is a very powerful reminder of the human element of this tragedy...1,415 lives lost and countless others affected.
What appears to be a section of deck rising vertically in the foreground. You can see panels of corticene (a kind of linoleum) along with retaining strips. As such, this is likely a piece of the lower bridge or forward shelter deck.
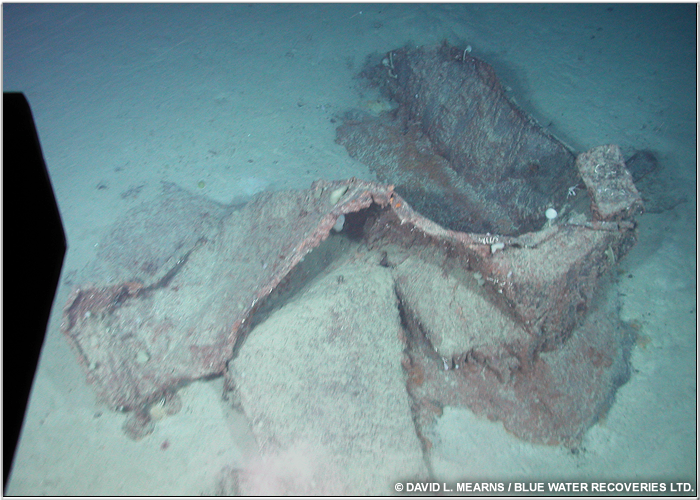
More twisted metal plating. This could possibly be deformed W/T trunk or vent.
Even more twisted metal plating. Due to its light nature, this could be part of a superstructure screen, but it is difficult to say for certain.
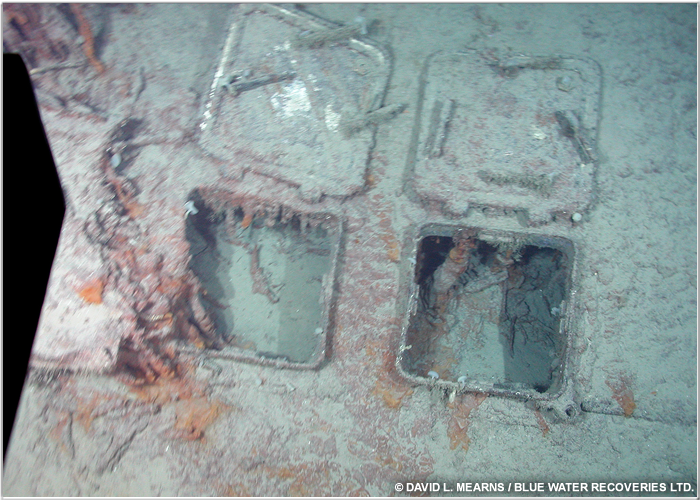
To some experts these appear to be windows. To other experts, they appear to be hatches. The small size is indeed more suggestive of a window than a hatch, but generally speaking, Hood's windows were not as rounded at the corners and they were slightly taller than they were wide. There is also the matter of what appears to be a stanchion socket on one of the openings...this is a feature windows didn't have. That is more suggestive of a hatch (stanchion sockets were used for hand rails). Unfortunately we have not yet been able to locate these items within plans of the ship.
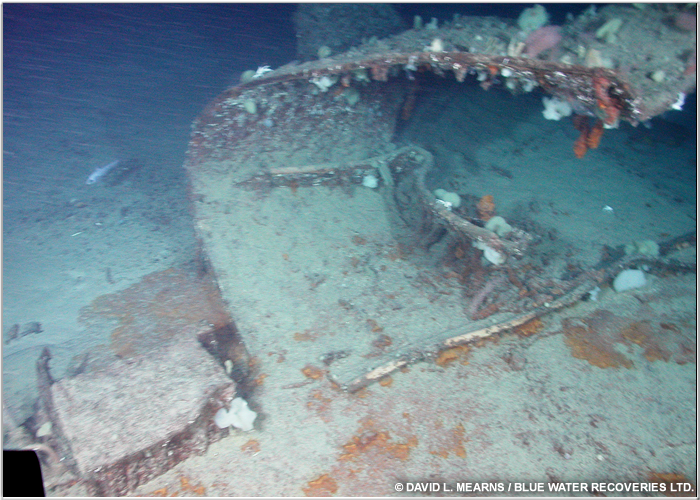
The edge of one of Hood's 15" gun barbettes
We are not 100% certain what this is. It may be the top of a vent trunk or ammunition hoist.
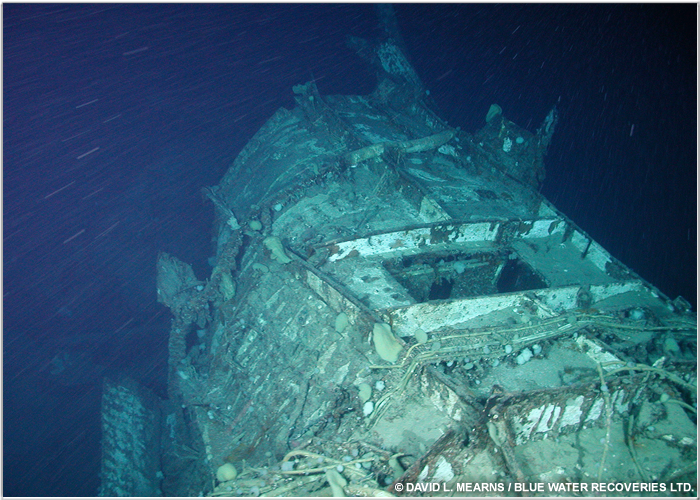
This appears to be a severely warped section of decking from near the Captain & Admiral's large cabins. This was blasted into this deformed shaped by the force of the rear magazines exploding. We "top" section shown here is actually the underside of a deck (what was once a ceiling). The large opening is possibly a through-deck ladder access way, a ventilation opening or hoist trunk opening.
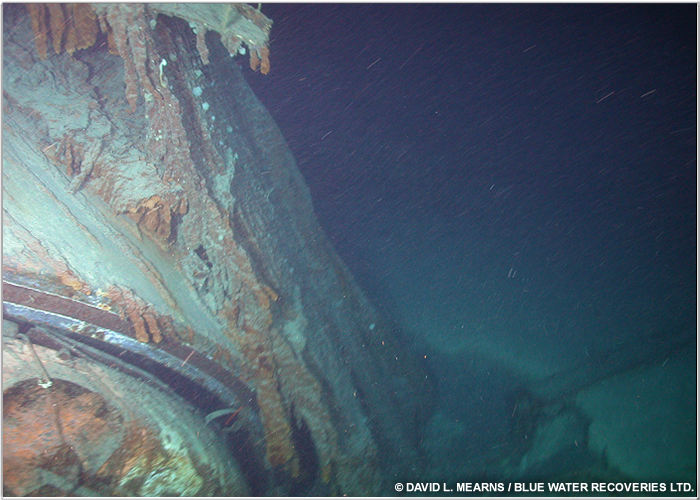
One of the aft two 15" barbettes, most likely "Y" barbette. From other angles, it is reported to show signs of a large, upward-rushing explosion.
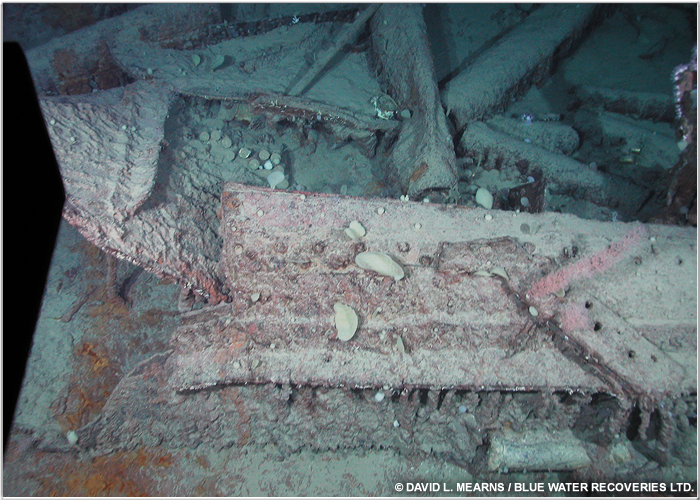
Left to Right- Barbette armour (lower section), Ring Bulkhead (support to lower roller path), Lower Roller Path, Roller Ring (complete with rollers) and the base of the Turntable.
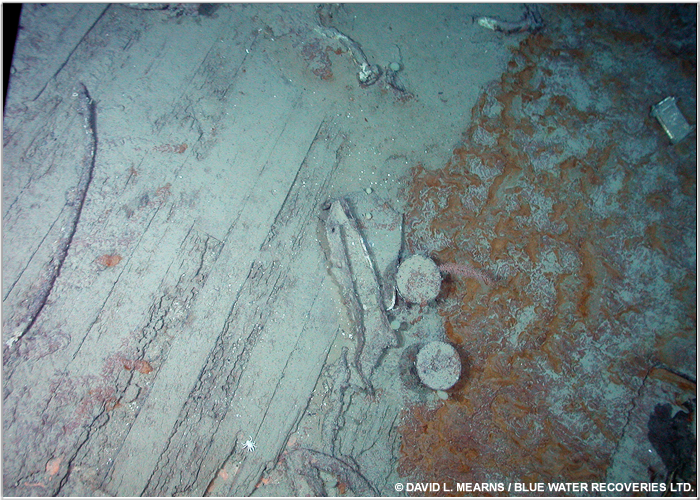
Section of planked deck. It is not clear what the twin round items are. Whatever these items may be, they are certainly small when one compares them to the 9"/22.8cm wide teak planks. This at least rules out these being bollards. It has been suggested that they could be a pair of Lewis gun magazines, but this is impossible to confirm at this time.
Twisted beams and plating. Note the assorted 4" shell cases and pom-pom anti-aircraft ammunition in the rear.
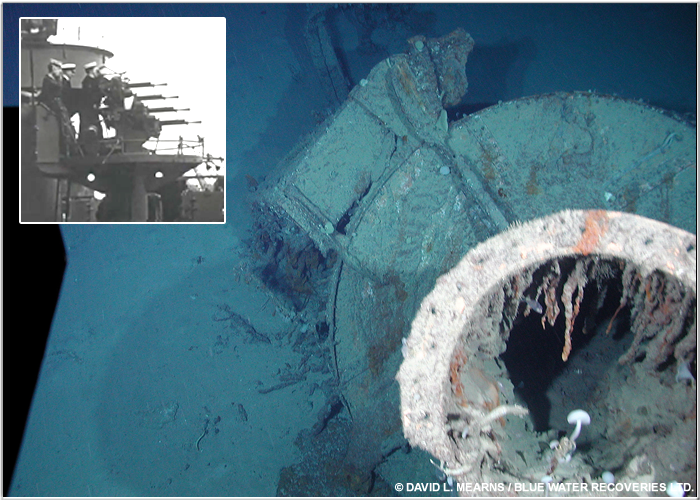
Above/Left- This is one of the aft 0.5 inch machine gun platforms that used to be abreast the after superstructure (gun positions "M3" aka "Simon" and "M4" aka "Paul" ). We have no idea which of the two it is though. The rectangular object at top/left is an attached ready-use ammunition locker. Each mount carried one on its pedestal and one on the deck below. Inset - The shipboard location of the aft 0.5" platforms.
Above/Left- This is another view of the 0.5" machine gun platform shown above. Note the metal stanchions and the training mechanism as well as the bent metal shield that protected the front of the gun. Inset - Shown here is one of the platforms (including the shielded gun) aboard the ship in 1940 or 1941.
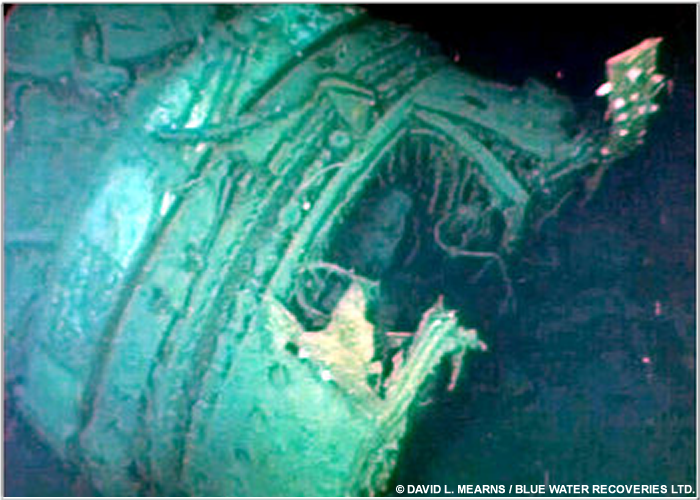
Above- This is possibly an external section of the port screen just outside of the Admiral's Day Cabin (viewed upside down). We are not 100% uncertain though; although we can see indications of Home Fleet Dark Grey exterior paint, we cannot see the "rigols" (small metal rain guards) that should be above both openings. They may have been ripped (or rusted) away. If so, then we are viewing this area upside down. Inset- The same features from 1920s era photo of Hood.
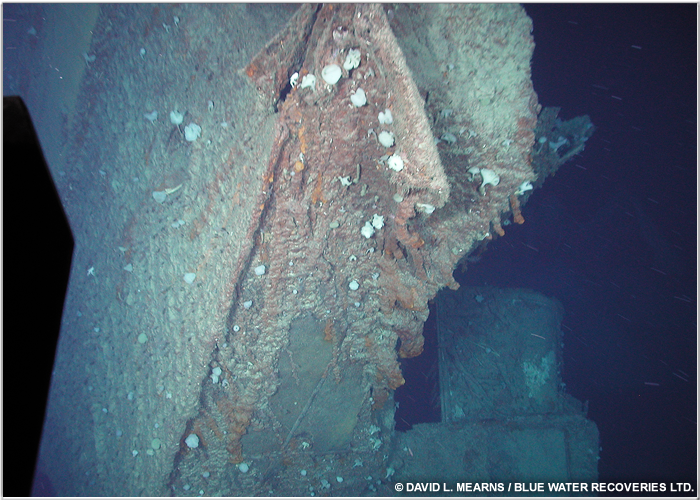
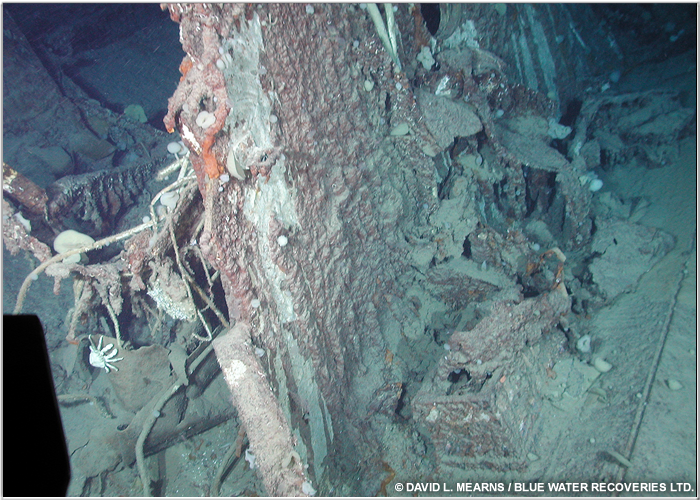
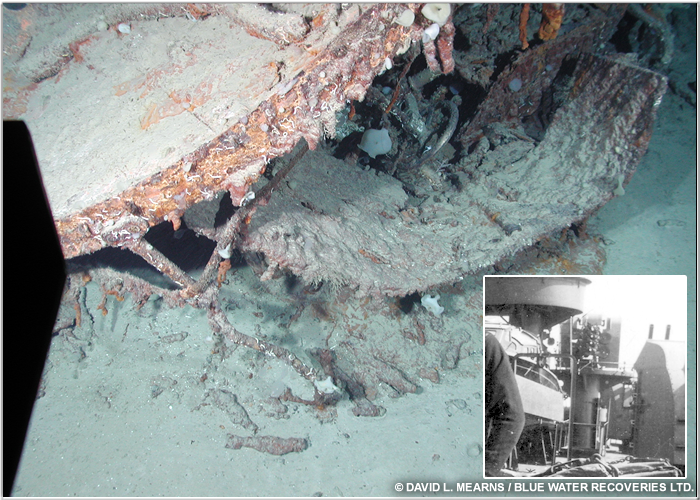
Above- This appears to be a section of bulkhead. We're not able to identify its original location on the ship.
Expedition Overview | Wreck Overview | The Bow | The Midsection | The Stern | Debris, Pt 1 | Debris, Pt 2 | Debris, Pt 3 | Memorial Plaque