Expedition Overview | Wreck Overview | The Bow | The Midsection | The Stern | Debris, Pt 1 | Debris, Pt 2 | Debris, Pt 3 | Memorial Plaque
Assorted Debris & Wreckage, Part 2
When Hood exploded, collapsed and sank, the ship was violently ripped apart. Much of what was deposited on the ocean floor was severely distorted, making recognition difficult. When preparing these pages, we were only able to consult the photos presented here. We were not able to view the raw video footage, nor see most items from different perspectives. These limitations, combined with the lack of any scale indicator, made precise determinations difficult at best. Nevertheless, we've done our best to identify the various pictured pieces here.
Please note that we have slightly modified some of these photos; some were lightened/brightened a small amount to reduce the "murkiness" inherent in underwater photographs. Lastly, please be aware that this page is image intensive, and may take some time to fully load.
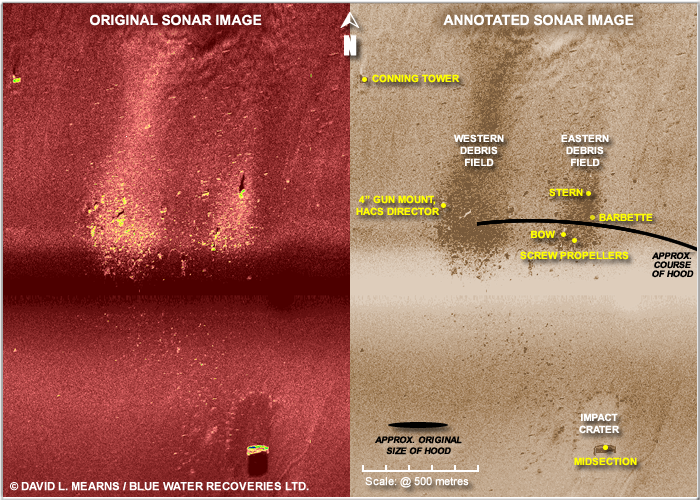
Sonar view of the Hood wreck site: On the left, the original Ocean Explorer 6000 side-scan sonar image from July 2001; On the right, an enhanced and annotated version.
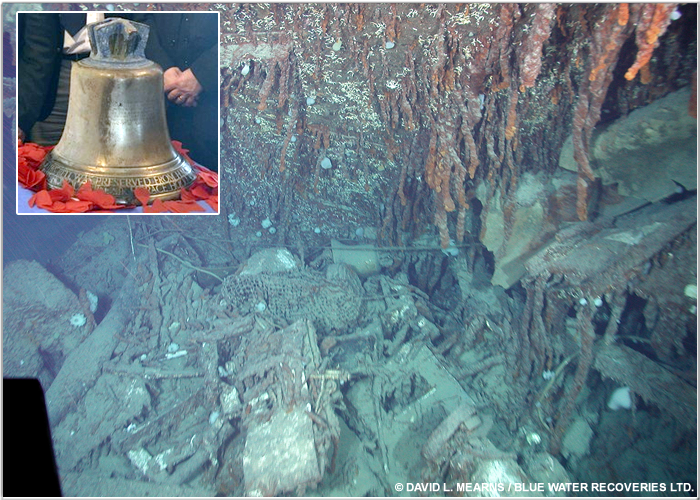
Hood's main bell was located near a large upturned segment of the captain's aft cabins. Hood is known to have carried at least three bells; two were large but fairly typical watch bells and the third was this smaller, more ornate bell. This particular bell was the most important of the three. It had previously been used aboard the pre-dreadnought battleship Hood and was given to Admiral SIr Horace Hood following that ship's retirement. Following the death of Sir Horace at Jutland, his widow, Lady Hood, gifted the bell to our Hood.
The bell bears two inscriptions: the first, located around the lower edge reads "This bell was preserved from HMS Hood Battleship 1891-1914 by Late ADM Hon. Horace Hood killed at Jutland 31 May 1916.". The second inscription, located on the side of the bell reads "In accordance with the wishes of Lady Hood it was presented in memory of her husband to HMS Hood battle cruiser the ship she launched 22nd August 1918." In addition to the inscriptions, the bell still wears vivid royal blue paint work on its crown as well as its interior. The bell was recovered in August 2015 and subsequently preserved for display at the National Museum of the Royal Navy, Portsmouth. Inset- The bell in May 2016.
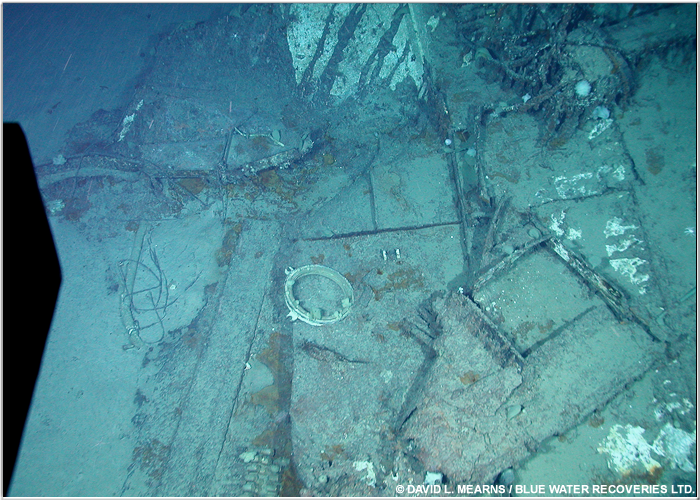
Assorted debris. The circular item appears to be an interior scuttle frame. The square opening may be a ventilation trunk. At the bottom of the photo, just to the left of centre, belted 2lb Pom-Pom ammunition is visible.
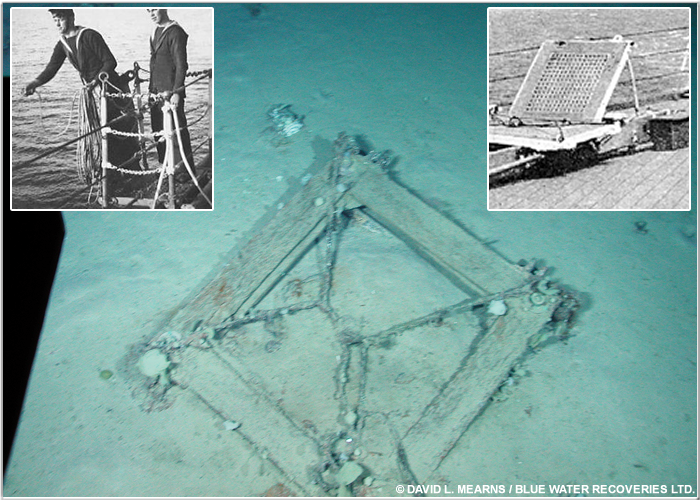
Frame of a wooden platform. This could be one of the leadsmans platforms, or, possibly a ladder platform. Insets - The left hand image shows a leadsmans platform and the right hand image shows a platform on a stowed accommodation ladder.
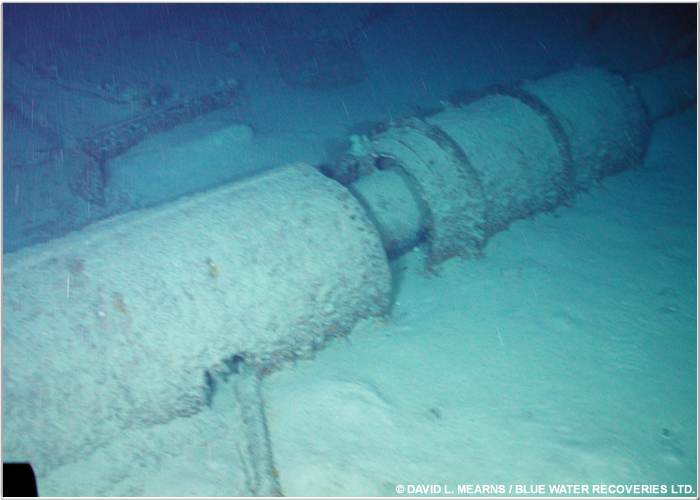
Propeller shafting near the outermost screws in the eastern debris field.
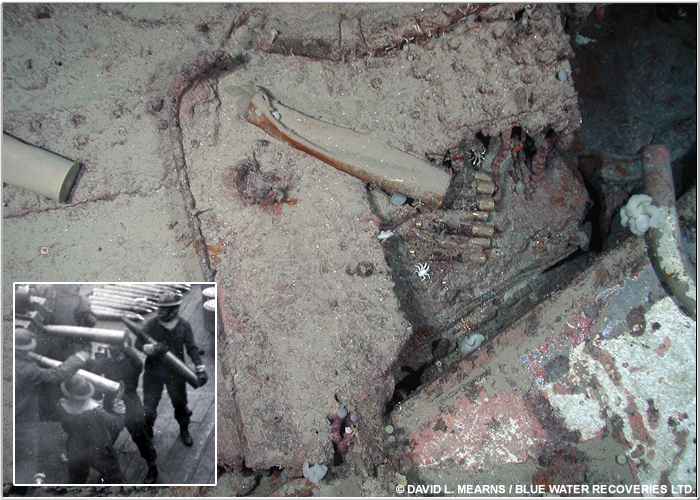
Above/Left- Belted 2lb Pom-pom ammunition and deformed 4" shell brass casings sitting atop plating/debris. Inset - Gun crews handling 4" ammunition in 1940/41.
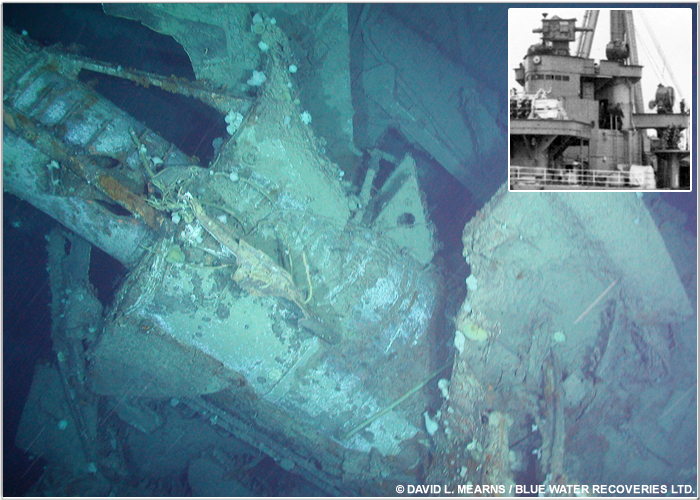
Above/Left- The centre portion and HACS base of the After Superstructure. We've rotated the photo somewhat to make it more readily recognisable to readers. Its shown here with its top pointing up and to the left. Though the searchlight platform, actual HACS Mk III* director and the After Concentrating Position have been ripped away, this area is still surprisingly intact (considering its proximity to the conflagration/explosion). The thin part at the top/left is the cylindrical base of the missing HACS director. Inset- this is how the structure looked at the time of the ship's loss.
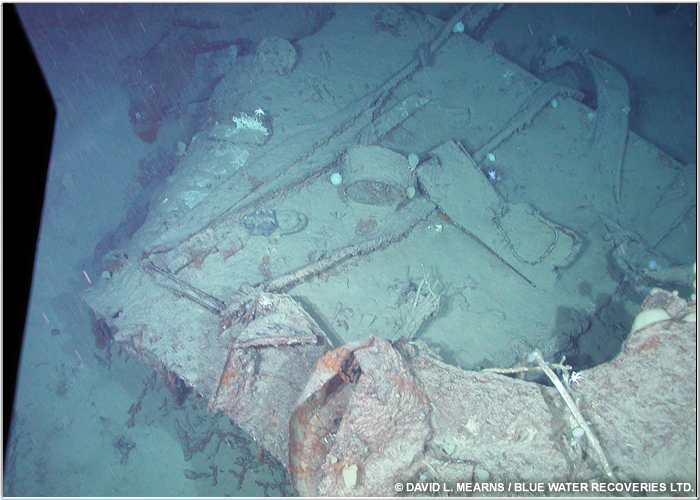
A large section of hull structure. This may be from one of the engineering spaces. Note what appears to be ventilation trunking.

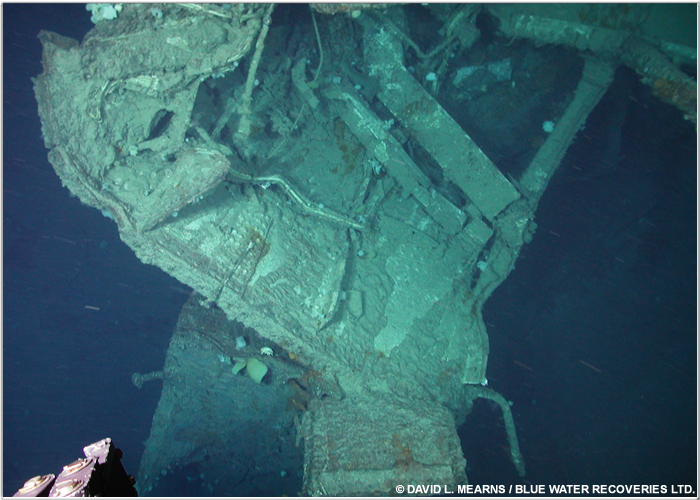
The base of the Conning Tower. This piece of wreckage is located well north of the hull and two main debris fields.
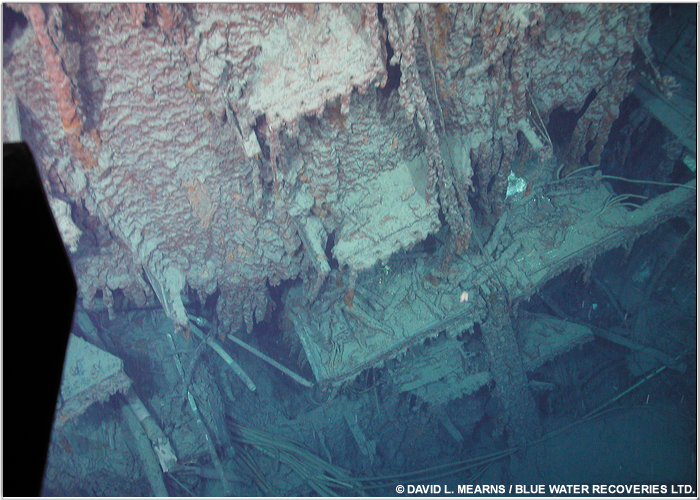
Lowest portion of the Conning Tower. Note the doorway in the light bulkhead to the right. Also note the electrical wiring. The interior is surprisingly intact.
Another view of the base of the Conning Tower. Note the bundles of electrical wires dispersed throughout this section (that is not plant life!).
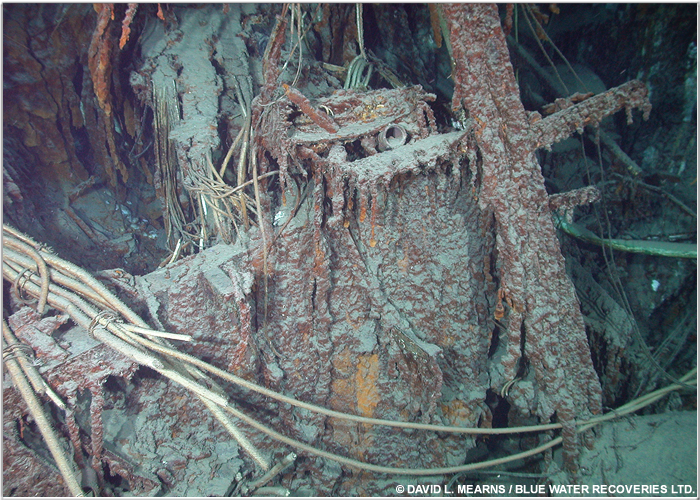
More twisted plating. Possibly a superstructure bulkhead.
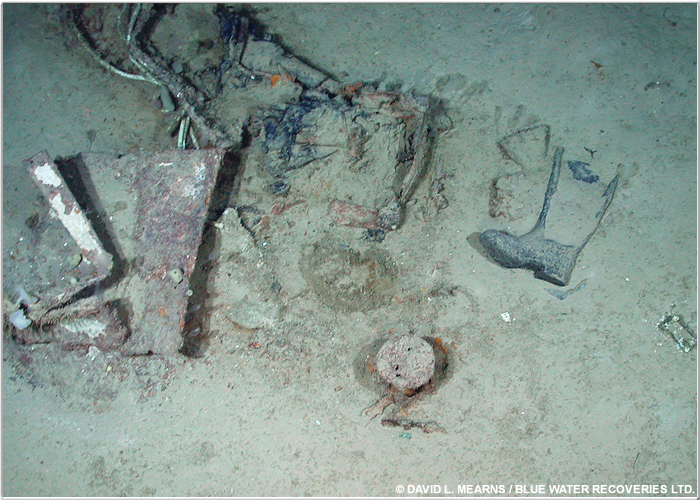
Yet another poignant reminder of the human element - a stoker's boot. It is one of many seen dispersed throughout the wreck site.

Above/Left- Smaller bits of debris. Crushed tubing and what may be a mess tin (centre) or a slightly deformed bucket/pot. Inset- Close-up of same item taken from a slightly different vantage point.
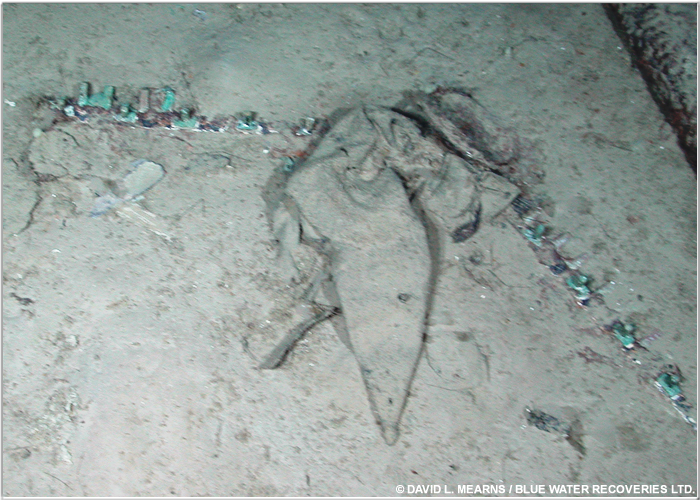
It is difficult to say what the 'crumpled' item in the centre is; it could be extremely deformed metal, but its also possibly leather outerwear of some sort. Its lying atop a chain. This chain may be part of one the 4" ammunition dredger hoists, or some other type of hoist.
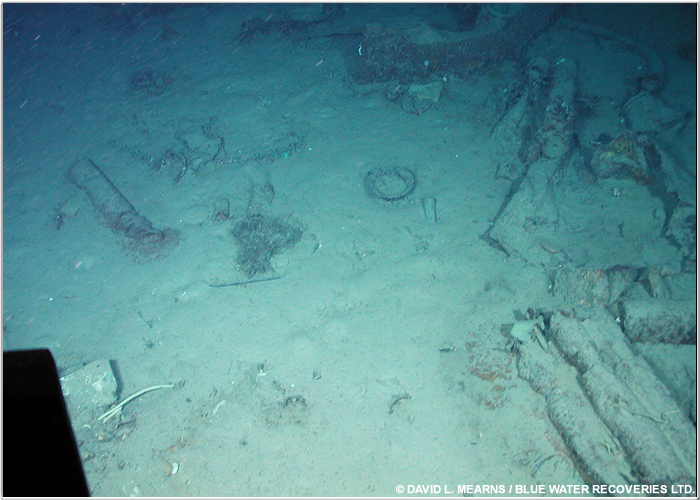
Assorted debris.
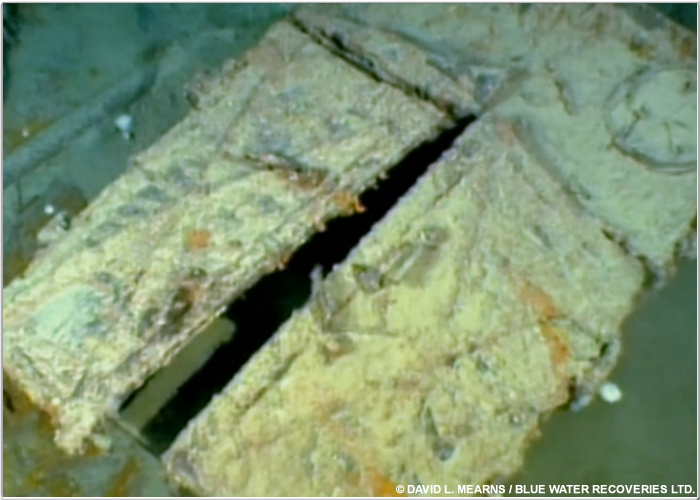
One of the many ready-use ammunition lockers that once sat on Hood's boat deck.
Expedition Overview | Wreck Overview | The Bow | The Midsection | The Stern | Debris, Pt 1 | Debris, Pt 2 | Debris, Pt 3 | Memorial Plaque